SharePoint Integrated Security on the Intranet with Anonymous Security on an Extranet
Don't worry about the why's, just focus on the how's.
So essentially this is what the business wanted:
Business Need - We have a rather large library of techincal manuals that we needed to expose to a specific vendor. These manuals are mostly in PDF but they also had forms that needed to be filled out and all other kinds of goodness. The vendor had a DNA alias on their side called manuals.site.com (yes, it's fake to protect the guilty). Internally our intranet was called intranet (and again, fake name). Internally we have Integrated security (NTLM) configured for our Intranet. Here is the kicker. They wanted the vendor to not have to use a username and password (or in other words) but come in as anonymous. Well so much for logging events.
Anyway, we argued for a while and eventually got overruled. So off we went to set up our wacky solution.
Ok, first of all, we had no extranet set up so we started with that.
Here is what we did.
1. We got the name of the URL that the vendor would be using - manuals.site.com
2. Just to be safe we mapped an internal DNS entry from our current Intranet to manuals.site.com. That way the help desk could type in the URL and receive the exact same stuff on their screen as the vendor saw if there were any problems. Alternatively the Help Desk could have just modified their HOST file and add the entry there but.....that was ugly.
3. Time to log into Central Administration - for us let's assume it was http://intranet:8000/
4. Navigate to "Application Management"
5. Now here is the important part. You will now extend you current Intranet site. It may be on port 80 it may be on port 800. Ours was on 80 so we'll start with that.
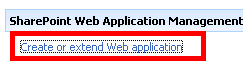
6. Click "Create of Extend a Web Application"
 7. Be sure you click "Extend an Existing Web application"
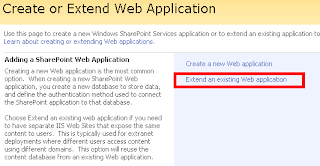 8. On the Extend Page do the following:
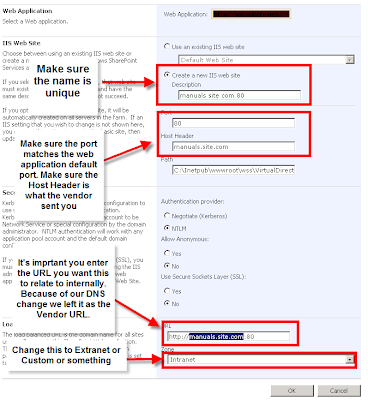
Web Application: choose you current Intranet or default site, ours was the one on Port 80. On the Use or Create a new IIS web site choose "Create a new IIS Web site". Sharepoint will try to use a default name, change it if you don't like it. Change the Port to the *SAME PORT AS YOUR INTRANET*. So if your Intranet is on 80, put this extended one on 80. Put the vendor URL in the Host Header exactly as they gave it to you. Leave path alone. But if you ever have to modify the web.config for your Intranet you will also have to modify the web.config for your extended site as well. Under Authentication provider choose your appropriate level, ours was NTLM. Under Anonymous choose Yes or No, we'll set it again later on anyway just to make sure. We choose Yes. We didn't use SSL, but choose Yes if you do. Take note of the URL, make sure it looks right. ZONE: This is important. Generally your first site application with a collection built in it is called Default. This one will be differnt so we chose Extranet. Click OK when done - It may take a few minutes for IIS to propogate these changes throughout the farm. The extended site will then appear in the IIS Manager for all of your Front End Web Servers. You will not see this new extended application in the "Web application List", you have simply extended your original site. I know it sounds weird.
 9. Now go to Application Security
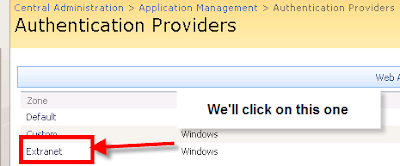
10. Click on "Authentication Providers"
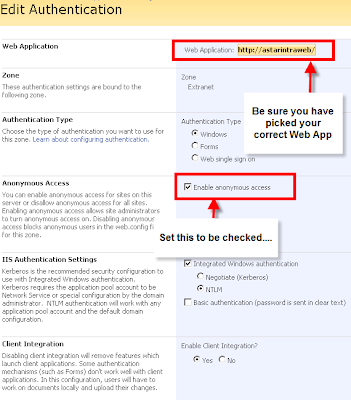
11. You will see a single Provider for each zone you have (Default, Extranet,etc). From here you click on the approriate Zone and you can modify it's security. Be careful here.
13. Here, simply click "Enable anonymous access" for the Zone you extended, in our example it was the Extranet Zone. Click "Save"
14. Now click on the "Policy for Web Application" link
15. Here you are going to add a valid DOMAIN user and give that user Full Control of the Zone you just extended and set to anonymo and click us
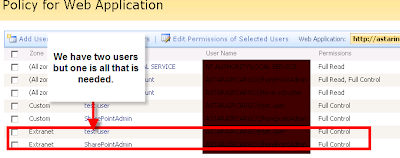
16 Click "Add Users" - select the approriate zone from the drop down and click Next. Make sure your Intranet or base port 80 web application has been selected. Pick a user to add from your AD. Give the user "Full Control" and click Finish.
17. Now go to the "Operations" section and find the "Alternate access mappings" link under "Global Configuration"
18. You should see an entry for you new host header from your extended application. If for some reason it doesn't show up choose "Edit Public URLs" and enter the information from your vendor HOST HEADER into the approriate Zone field.
19. Now it gets tricky. Just enabling this new Extranet didn't really give it Anynmous Access, you have to navigate to the site to actually turn on the feature under "Advanced Permissions" at the Site Collection root level.
20. This is where the DNS entry you made way back at Step 2 helps. You can't use your current Intranet t make these changes as your Intranet is your Default Zone and it was not set to anonymous access. You *MUST* access the site using the host header you entered when you extended the site. You can modify your host file and simply add an entry in case you don't have the ability to change DNS. The entry would read
Once this is done whenever I type MANUALS.SITE.COM in IE it will actually route to the Intranet.
21. Log into the site using the Vendor URL. You should see a "Sign In" button but no Mysite and automatic login stuff. You will also notice that you can't see the Site Actions button. Click "Sign In" and sign in as the site owner.
22. Now it should still be using the Vendor URL. Go to "Site Actions" -> "Manage Site Settings"
23. Click "Advanced Permissions" under "Users and Permissions"
24. From the "Settings" toolbar choose "Anonymous Access" and click on the button to turn it on. You can set the level of access they have here.
25. Done!!!!!!
Now it truly works. For what it's worth that is....
Please be aware the any InfoPath forms you have will not allow people to save content unless you change a fe other things. Also, you can set anonymous access to the various features in your site now as well.
If you have any questions just ask.....
21. I


Comments